

In the fast-changing world of web design, careful planning is crucial for successful projects. A well-structured plan is essential to avoid missed deadlines, unhappy clients, and team problems. This guide explains why a website project plan is so important and gives a clear roadmap on how to plan and carry out a web design project effectively. Drawing from the best practices in the industry, this article aims to give you the knowledge and tools you need to succeed in website design planning.
Why Make a Website Project Plan?

Building a website that works well depends on having clear goals and a structured approach. A website project plan acts like a map, making sure everyone involved knows the project’s goals, when things need to be done, and what needs to be delivered. Without a plan, teams can make wrong assumptions, leading to more work, missed deadlines, and clients who aren’t happy. A solid project plan reduces risks, improves communication, and makes the whole project run more smoothly.
How to Plan a Website Project?
Step 1: Research and Requirements
Before starting any web design work, do thorough research. Begin by clearly defining what the website should do — whether it’s selling things, showcasing work, or giving information. Understand what the client wants and figure out who will be using the site. Create detailed profiles of the typical users to guide the design and content.
Early on, identify any limits to the project, like how much money is available and when things need to be finished. These limits set the project’s boundaries and help decide what’s most important. Write up all these details in a short project plan and get the client’s approval before moving forward.
Step 2: Plan Project Stages and Tasks
Once you know what the project involves and the client is on board, lay out the specific steps and tasks needed to finish the website. How you do this depends on your project management style, whether it’s Agile (more flexible) or Waterfall (more structured). Typical stages might include:
Establishing the Brand, Structure, and Look:
Decide on the site’s name, slogan, and overall style.
Finalize important visual elements like the logo, colors, fonts, and page layouts.
Create a map that shows how the site’s parts fit together and how people will move through it.
Preparing Content:
Get and organize all the text, images, videos, and other stuff the site needs.
Work with people who create content to get it done on time and keep it good.
Double-check everything to be sure it’s right and stays the same across the whole site.
Designing and Making the Site:
Make pictures and designs that match what the client said they wanted.
Turn those designs into real web pages using computer languages like HTML, CSS, and JavaScript.
Add in the tools the site needs, like ways to buy stuff, tools to keep things up to date, or things you can click on to make things happen.
By following these steps and being careful with each one, you can make sure a website gets made well and people like it when it’s done.
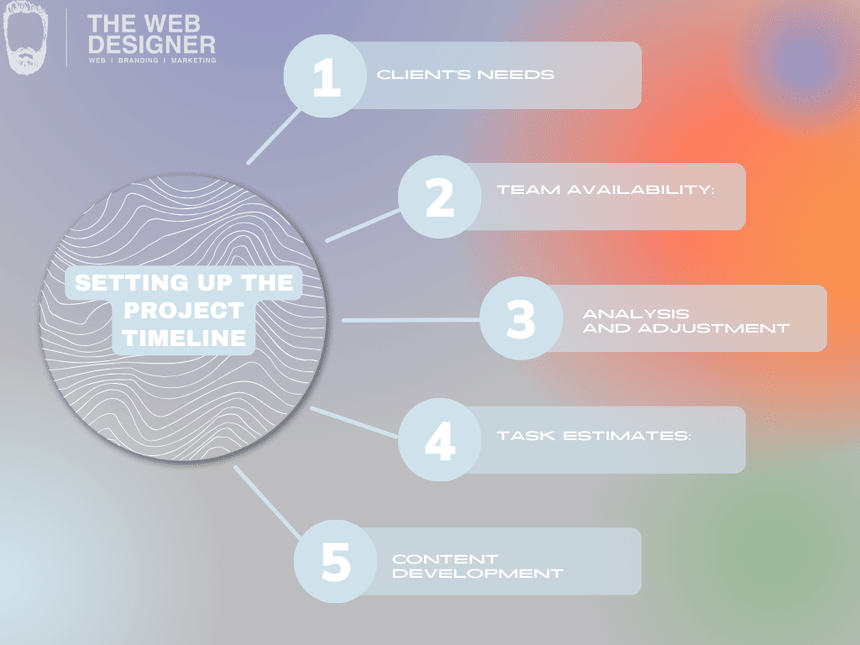
Step 3: Setting Up the Project Timeline
After identifying project phases and tasks, the next important step is to create a detailed project timeline. This timeline outlines when each task and milestone should be completed.
Consider these factors when making the project schedule:
Client’s Needs: Take note of any fixed deadlines or important tasks the client has highlighted. For example, if the website needs to launch alongside an event or marketing campaign, prioritize tasks to meet these deadlines.
Team Availability: Ensure team members have enough time to finish their tasks within the set deadlines. Consider things like vacations, holidays, and their current workloads to manage resources effectively.
Task Estimates: Estimate how long each task will take realistically. Include extra time for unexpected delays or changes that might come up during the project.
Use project management tools like Toggl Plan to help you see the timeline clearly. These tools let you assign tasks, track progress, and adjust schedules as needed in real time. This makes it easier to manage the project and coordinate with your team.
Step 4: Designing the Website Layout
 Once you have a clear project timeline, move on to the creative part of designing the website layout. This step focuses on turning ideas into visually appealing and functional web pages.
Consider these points during the layout design:
Visual Look: Use the final branding elements like logos, colors, and fonts in the website design. Keeping a consistent look across all pages helps people recognize and remember your brand.
User Interface (UI) Design: Create menus, buttons, and interactive features that are easy for people to use. Make sure everything works well on different devices and screen sizes.
Adding Content: Put in the text, images, videos, and other things you’ve already prepared. Arrange them so they’re easy to read and keep people interested.
By following these steps and paying attention to each detail, you can make sure your website looks good and works well when it’s finished.
Step 5: Coding the Website
Once the visual design of the website is final, it’s time to start coding. This means turning the design ideas into real web pages that people can use. Here’s what happens during this phase:
Coding Standards: Follow the best ways of writing code and web rules to make sure the code is good, easy to read, and works well on different computers and phones.
Adding Features: Create things like forms, buttons that do special things when clicked, ways to sell things online, and tools that help manage what’s on the site. Test all these features a lot to make sure they work right and are easy for people to use.
Search Engine Optimization (SEO): Make the website easier for search engines like Google to find by adding keywords and making sure it works well on phones and tablets.
Step 6: Testing and Launching
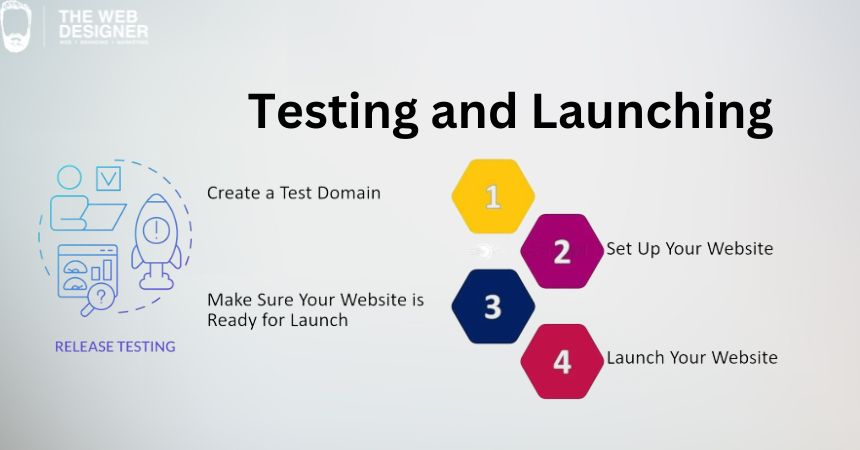 Before making the website live for everyone to see, it’s important to check everything very carefully. Testing is key to making sure the website works well, is easy to use, and meets high standards. Here’s what testing involves:
Checking Features: Test that forms, links, and other interactive parts of the website work well on every page and on different devices.
Checking Compatibility: Make sure the website looks and works the same in different web browsers (like Chrome or Firefox) and on different devices (like computers, tablets, and phones).
Checking Performance: See how fast the website loads and how well it works to make sure people have a good experience when they visit.
Conclusion
Creating a great website involves paying close attention to details, working well together, and following the best ways of doing things at each step. By carefully planning, designing, coding, and testing the website, you can make sure it meets the needs of the client and works well for everyone who uses it. Use this process to build successful websites that make both clients and users happy.